" /> : April 2006 Archives

« March 2006 | Main | May 2006 »

April 29, 2006

F350

I forgot to take pics of Matthew's truck again. So I just took pictures of old parts from it.

We replaced the ball joints and the front shocks. I got to use this ball joint press I've had for years. I've been meaning to buy the accessory kits for it, but haven't gotten around to it. One of them is for servicing this type of Ford joints. So I get the old ones out with what i have, and go to put the new ones in. Hmmm, I know I've done this before.
Hey look, somebody stashed a small piece of exhaust tubing in the cavity marked "this cavity for future use" and "Ford ball joint remover". I used it to install the lower joints.
I need to just break down and order the accessories from Harbor freight. They're not that costly. The little piece of tubing is starting to bow and mushroom :D
616x948

And here are the old parts. You know you cant resist looking ;)

April 27, 2006

rainy day. t-bird revisited

i forgot to post this pic the last time. No news is good news :)

The highlighted parts were a bit of swiss cheese, and the 'H' connector actually separated from the right side when I disconnected the pipe(s) from the car. Eventually, this should be replaced, but until then...

The metal was thin, but i managed to patch up the center by eliminating the 'H' junction, and packed the right side gasket area with "muffler mender". A couple sleeves to reconnect it where i had to cut it off the welded mufflers, and the car was relatively quiet... er.
Jason got it back several days ago and i haven't heard bad news, so hopefully it took. The pipe is thin, and the motor-mounts are bad which further stresses the exhaust, but it seemed to do OK while Sean drove it around for me.

I asked Jason to drive it around for a while before having it aligned to make sure the control arm/frame fix i did would take. Plus it needs new tires and has a 1" left lean in height.
The sliding upper arms are a bad design by Ford IMO. If it starts sliding again we will have to re-engineer it with Pontiac style shimmms ;) I got it to drive relatively straight, and checked the toe-in to spec with Sean's trammel bar.

Hope I can replace those mounts soon for the engine, and maybe some other stuff. Jason really ought to drive this beast. It's a nice car. It's probably difficult to tear himself away from the "GTO" though, plus the ol' bird eats fuel, unlike my 6cybird;).

I checked out Jim-n-Pher's 98 Corolla Wednesday due to some serious road noise. I wanted to make sure the bearings were OK, and they're fine. 115,000 miles.
The tires are going bad. Especially the left rear, right rear, one of the fronts, and the other, in that order ;) Recommend new tires and 4wl alignment. I rotated them for now (so the order has changed), to see how much of a difference it made. It probably made it worse, but they're getting new tires anyway, so we left it at that.
No pics for you.

April 24, 2006

shimmm

I was supposed to go out to Russell's place of business to do some work on a couple of his 1ton trucks, but he decided he needed to use them instead. Maybe tomorrow...

Instead, i did a couple of small things I've been meaning to do.

Just simple stuff. Sean bought some new LED trailer lights to replace the ones i busted a while back, so i installed them.

Then I installed some alignment shims in the firebird. Thus far, the alignment is simply eyeballed, and a real alignment is to come later, but the shims i used were home made. The new shims i got from "vette brakes and products" and they are the correct shims with markings on them to tell me how thick they are... 1/32", 1/16", & 1/8" increments. Their website and catalog used to show parts for Firebird/Camaro, but now it's all Corvette :( Some things, like the alignment shims, cross over.

April 21, 2006

rat-art benz? ...& other

A friend of Sean's came over with a mercedes he's been working on. I guess I didn't take sufficient pics. Maybe i'm getting lazy. It has spikes running down both sides, and baby doll faces for the wheel center caps. Flat black body, red wheels, bullet tail lights... cool as all get out ;)

Carlota dropped off her 323 again for me to put a master cylinder on it, and Geneva's truck is having problems again.
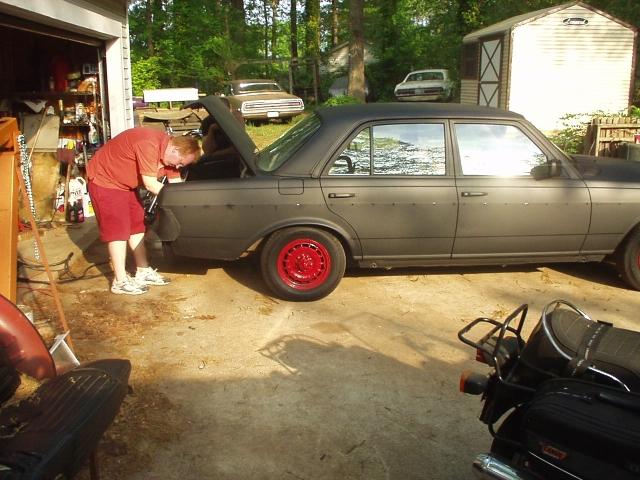
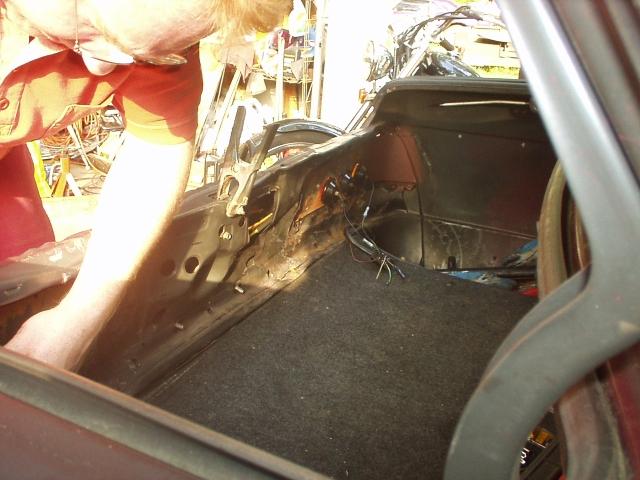
The Benz was a salvage car that had been hit in the back end. The tail panel has been replaced with flat steel, and the tailights replaced with bullet style lamps... old Impala style. They weren't getting good grounds, and the solution was decided to be welding the lamp brackets inside the trunk. Sean also installed a pair of license plate lights. It should now pass inspection.

Gotta do the master on the 323. It wont do the pedal-to-floor thing for me. Carlota says it might be ambient temperature related. Intermittent pedal drop & ambient temp related point to master cylinder usually. I just hope she isn't feeling a low pedal as the semi normal result of 70% worn pads at all 4 wheels on these cars. Maybe we'll do the pads too. They dont technically need to be replaced yet, and i dont see how the ambient temp could affect them. They do make the pedal a trifle lower, which is contrary to hydraulic law if you dont consider inefficiency in the system.

Geneva's truck....
Geneva's truck....
G, G, G,...

She ran out of fuel.
The fuel gauge wasn't working. Could me my fault. I put stuff back together like i was s'posed to. I didn't take any of it apart at first.
Hope it wasn't me. She drove it for wednesday and a little bit thursday.... fuel read full all the time.

Anyway, she ran out of fuel. She ran out of fuel in the injected diesel and wore the batteries down trying to start it. To make matters worse, she had some help trying to start it. sounds good, probably wasn't. Somebody used ether (starting fluid). Pretty much a no-no on a diesel. We hope there is no engine damage.
It wont start. It cranks slowly.
It was cranked until the batteries wore down.
They tried to jump it with a bitty car.
She had it towed.
The shop charged and tried, charged and tried. Said she probably needed a starter. They said they also bled the injectors.

The thing is, with these, I believe #1, if they run out of fuel the injectors might need bled first. #2 they need a full charge (4-8 hrs on the charger before you TOUCH the ignition switch if the voltage is low), or another Dual Battery Diesel for a jump-start if only slightly low batteries. If using a bitty car for jump starting, you just sit there with it running for about 6hrs, wishing you could just plug in a charger and go to the pub.

Though I took these on faith, i never thought that hard about it. I don't know much about diesels, but i hear they wont run on air ;)
After thinking and consulting (my brother is so smart) I realized
(and I think i knew this but keep it either in that recessed place in my brain connecting to "read shop manual" or the part which says "if you abide the rules, you need not think of the consequences of breaking them".... probably the latter which unfortunately is a rarely used section of my grey matter.)
that continuing to try to start a vehicle with low voltage can ruin the starter, and continuing to (not fully) charge and then discharge batteries can ruin them as well.

So.... she's had it towed back to her house... take batteries out and starter out. Have batteries tested and replace starter. As long as that guy with the ether didn't treat this like a gasoline engine, we should be fine.....
and get the fuel gauge working :embarassed:
--
spott

April 18, 2006

house call

I went to geneva's last night to spend today working on her truck. The wiring was a little fudged and it wouldn't start, and the steering column was partially apart from when they changed out some electricals. The the ign switch needed to be re-aligned because it was keeping the shifter from working correctly.

The no-start fault when i got there turned out to be just a wire on the starter swapped around, which i was able to fix last night. That wasn't the original problem, just a consequence of not having a good work area and difficult technical communication. The original problem she and her beaux Louis already had fixed, and the column stuff they just didn't have time for today because of work.

Oh yeah, I took a picture of an incense burner i made for her a while back (it was going to be an ashtray but i couldn't bring myself to cut notches in it). It's made out of a brake caliper piston and a u-joint cap, with some little u-bolts for legs and tail.

April 14, 2006

goodfriday

I'm told if I dont have any comebacks, it means i'm not working on any cars. Well, I had two today, plus did some other stuff.

The Gabriel struts I put on Dick's Caravan last month decided to crap out. They started bottoming out and making all kinds of noise. We swapped them out under warranty, and I put on some new mounting plates and cushions to hopefully fend off any more problems.
The brakes i put on were also cooked, and the rotors warped. New rotors, warranty pads. Yayy.
No labor money for me. Too bad i dont make money on parts. My labor is guaranteed 90days even if not my fault. Longer if it is my fault.

Laurie came by with her Miata. I put brakes on it some time ago.

The RR caliper bracket is slightly bent, but the brakes appear OK. They were making some bad noises though. I took them apart and relubed everything and it seemed to fix it. The moly-lube I used before appeared to dry out, so this time i used silicone lube. Eventually we will redo the back brakes w/ that bent bracket.
She gave us strawberries :D

Last night I finished up the new cross-shaft on the Thunderbird. If it continues to slide, I have a plan to eliminate the slide/slots, and use shims instead, like a GM.

My friend Steve came by with his new 2006 Miata. Nice car. All aluminum engine... oooooo

I also did ft struts and rear shocks on Mr. Hanky... a 1982 Honda Civic Wagon belonging to my brother in law. More Gabriels. :-/

Sean fixed a vacuum leak on his Cougar.
here's all the pics.


April 9, 2006

Painless

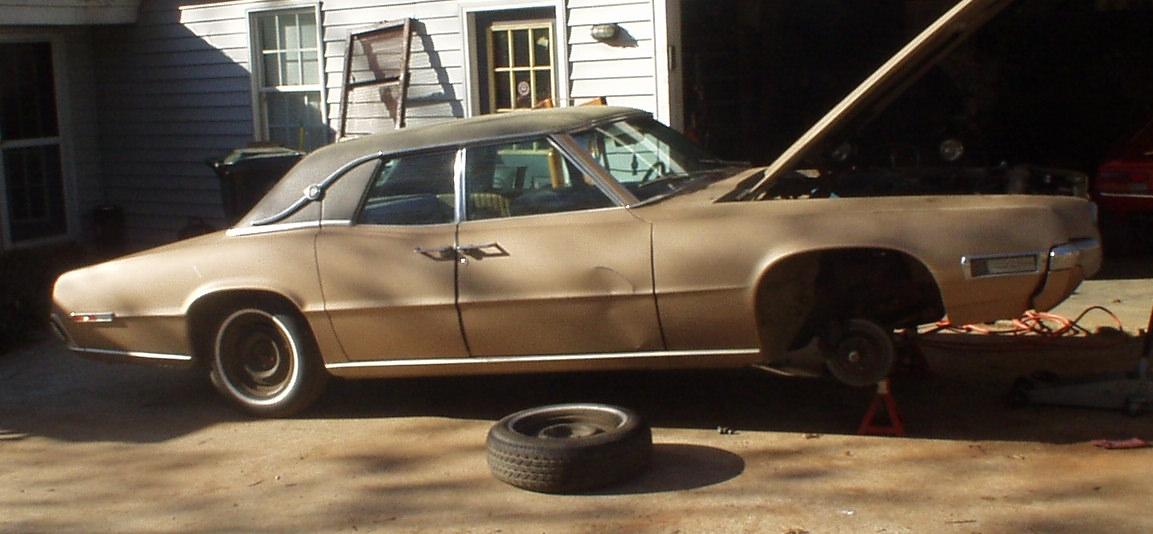
gotta love those suicide doors!

Jason's 1968 Thunderbird.
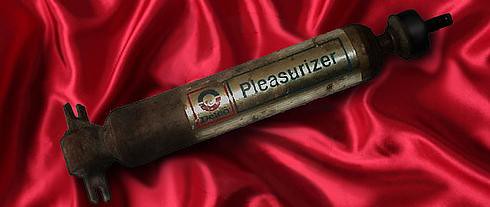
(pleasurizer shock doner)
It's a little rough, but a nice car. It wont hold an alignment and makes a scary clunk/clang noise around turns. These two things, coincidentally, are related ;)

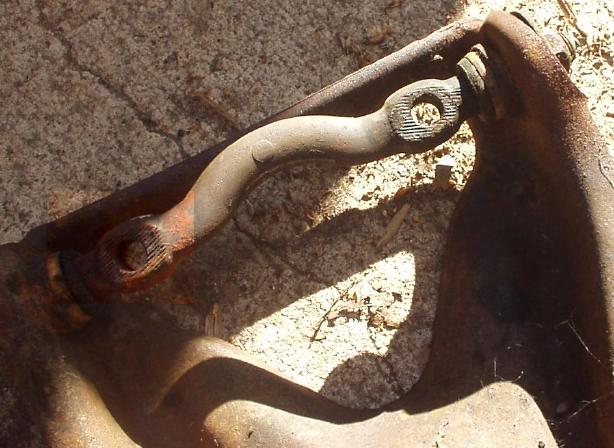
The alignment is set by the upper suspension arms sliding in slots to adjust the angle of the front wheels, then the arms are tightened into position to stay... theoretically.

The one on the left front continues to slide around even after it is tightened down.
I'm not sure what to do about it yet. He tried some spiked lock washers, and a couple other tricks that didn't pan out, so i took both arms off to look and compare.
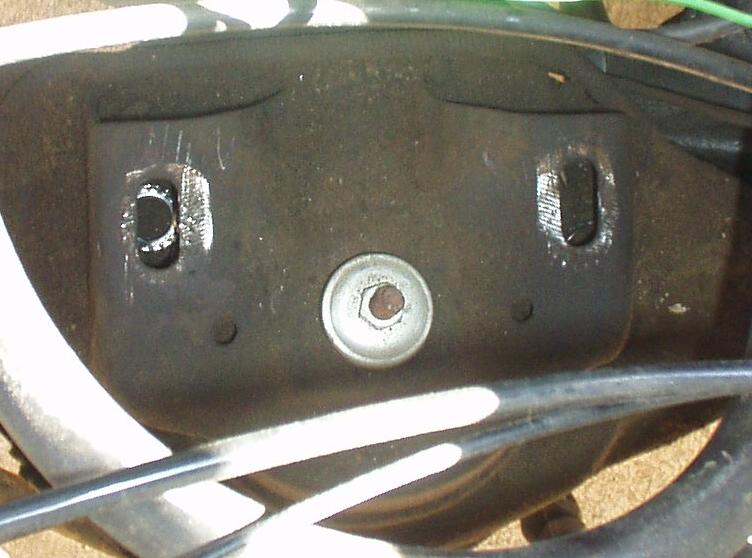
They dont look that different. There was a little more dirt packed in on the left side where the arm bolts to the frame. That might have been the initial cause, or it wasn't tightened down enough one time, and the more it slid, the more it wore down the ridges which hold it, making it worse.
It may also have thinned the frame a few thousandths of an inch there too. I know that doesn't sound like much, but it could be enough to matter.
I have a couple things in mind, but i want the input from the owner, Jason, and from my brother, both of whom are very smart.

Being a mechanic by trade doesn't always mean i know the best thing to do on someone else's 38 year old car, esp. when no one else seems to have run into this problem before. I think between the three of us, we ought to be able to decide on the best course of action.

Here's some pics of the left front arm and frame where the bolts go through. The right front looks about the same, except not quite as shiny on the frame.


April 8, 2006

it's alive


Well, the 'prang has all of its gears again. Time will tell if it actually shifts better under power. I dont think these transmissions were made for any real torque. I doubt the differential was either... it seems to be protesting audibly.
At least it can move around now. Sean took it around the block, and is out washing it now in the rain.
He seems very happy :)

April 7, 2006

removal


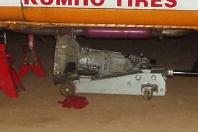
I have to admire my brother's determination. Some of the bolts holding the transmission to the engine in the Suprang were very nearly inaccessible.

drywall patch

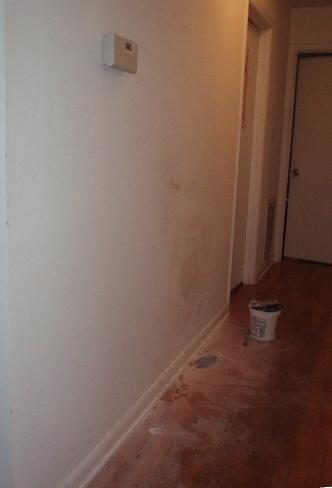
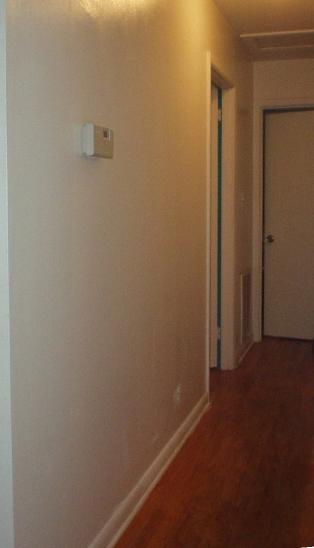
Yeah, I know. It's not about cars, and everybody already knows how to do this... except me. I fix cars, not walls. I have no wall tools. (insert bad wal-mart joke)
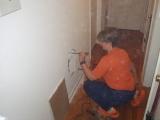
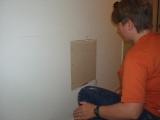
Anyway, Pher, who built her own house, came over on wednesday to teach me how to fix the hole i put in the hallway. She brought a roto-zip tool, and a bunch of other neat stuff. She patched it while i watched & learned. Thursday I sanded it and re-spackled it. Today I sanded it again, and then painted the hallway. If I had taken just a little more time you probably couldn't see the patch at all, and I genuinely suck at painting, but apparently so did the last guy who painted the hall. At least my paint didn't run. It's still wet in the pic so might look a little less patchy later.
Anyway, pics follow. If anyone wants to come over to point out my mistakes, feel free to re-do it on your own time during your visit ;)


April 6, 2006

Carlota Miata


I kinda forgot to take pics of this one while waiting on parts.

It now has 4 new Bilstein Struts (actually coil-over shocks), new dust bellows for same, and new ceramic brake pads on all 4 corners. Nice car.

April 4, 2006

ACK!


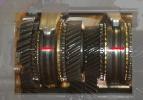
So I'm sitting here last night staring at this photo. This is the front side of the output shaft, and has pressed on gears. I had been waiting for the right puller attachment to disconnect it from the center case, as pictured. One of the parts on here is the clutch hub&sleeve of which i have a solo picture in a previous blog entry. The above pic is from before i pressed any of these gears off.

Anyway, here i sat last night, staring at this photo. Staring and worrying. The transmission is fully assembled now.
So these hub sleeves have a front and rear side. I dont know how well y'all can see it, but in the pic, there is a groove on the front sleeve (rt side of pic) which faces front. The groove on the rearward sleeve faces rearward. Did i put them on that way? I remember referring to the photo during assembly, but something was nagging at me, telling me that I have them both facing forward.
If so, the entire transmission needs to come back apart. ACK!
So with a stormcloud over my head and a tear in my eye, i head out to the garage this morning.

Remove speedometer gear & reverse switch. Remove case bolts & shift rod bolt. Remove rear case w/ rod. Remove front cover bolts and 2 snap rings. Remove front cover, and stare.
HOORAY!!!
I'm not a complete idiot!

I did it right. I dont need to completely disassemble. Just had to share with the world. Now let's see if I can do anything about the shift rod alignment while it's out ;)